Recently, I installed some polyurethane bushings in the rear knuckles of the 350Z, and found this write-up on Reddit, I wanted to make sure the information was preserved for anyone else who may want the information, so here it is! I have also added some additional details to help make the removal easier.
Original Source: Easy-Ad4094 on Reddit https://www.reddit.com/r/350z/comments/1mc0xe5/rear_knuckle_bushing_install/
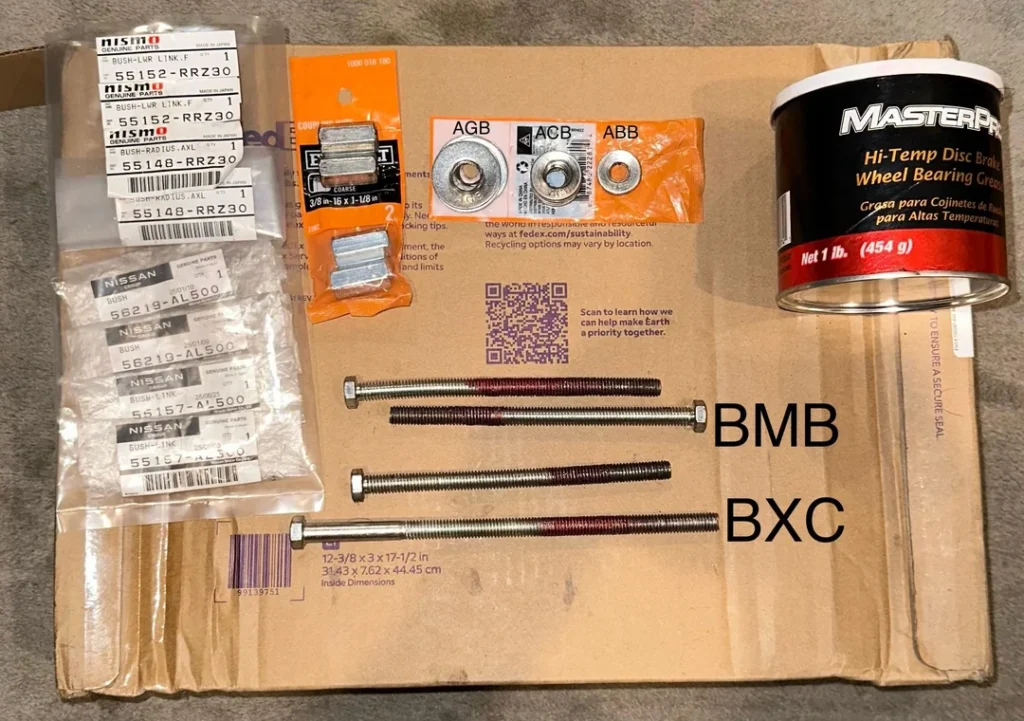
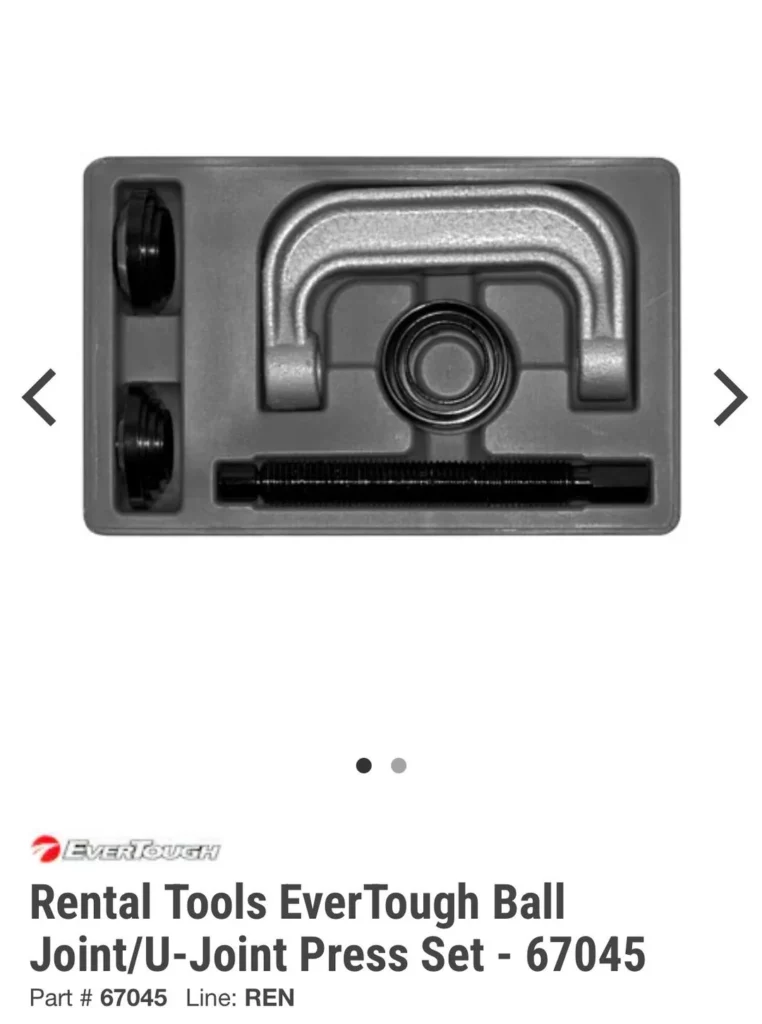
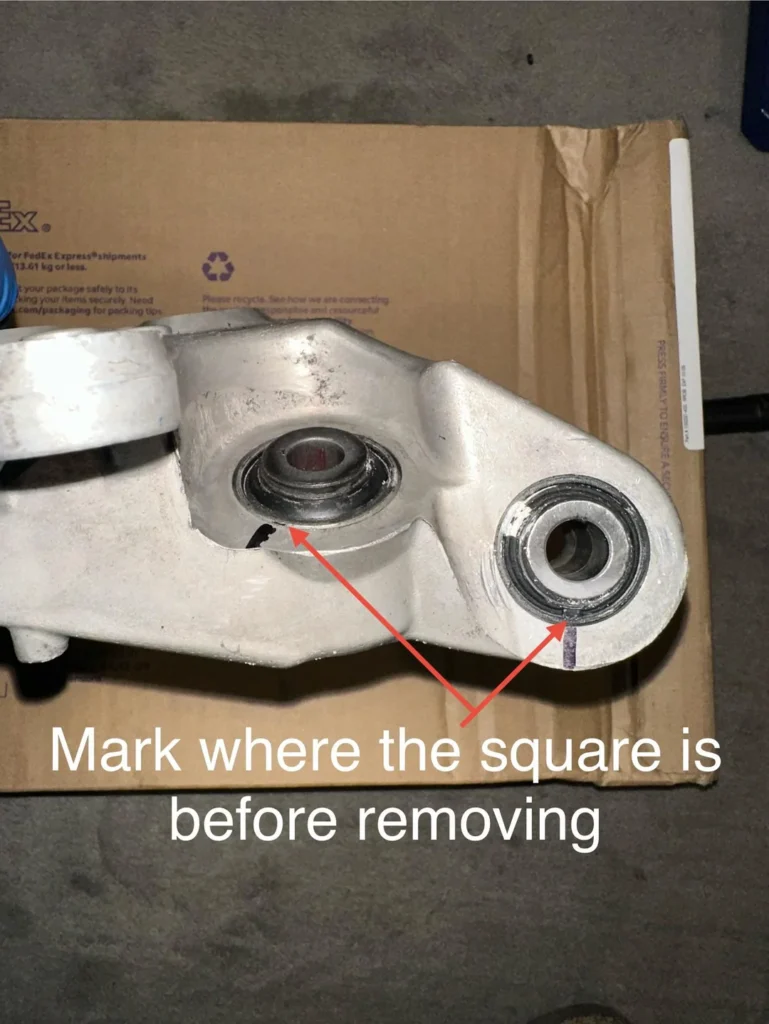
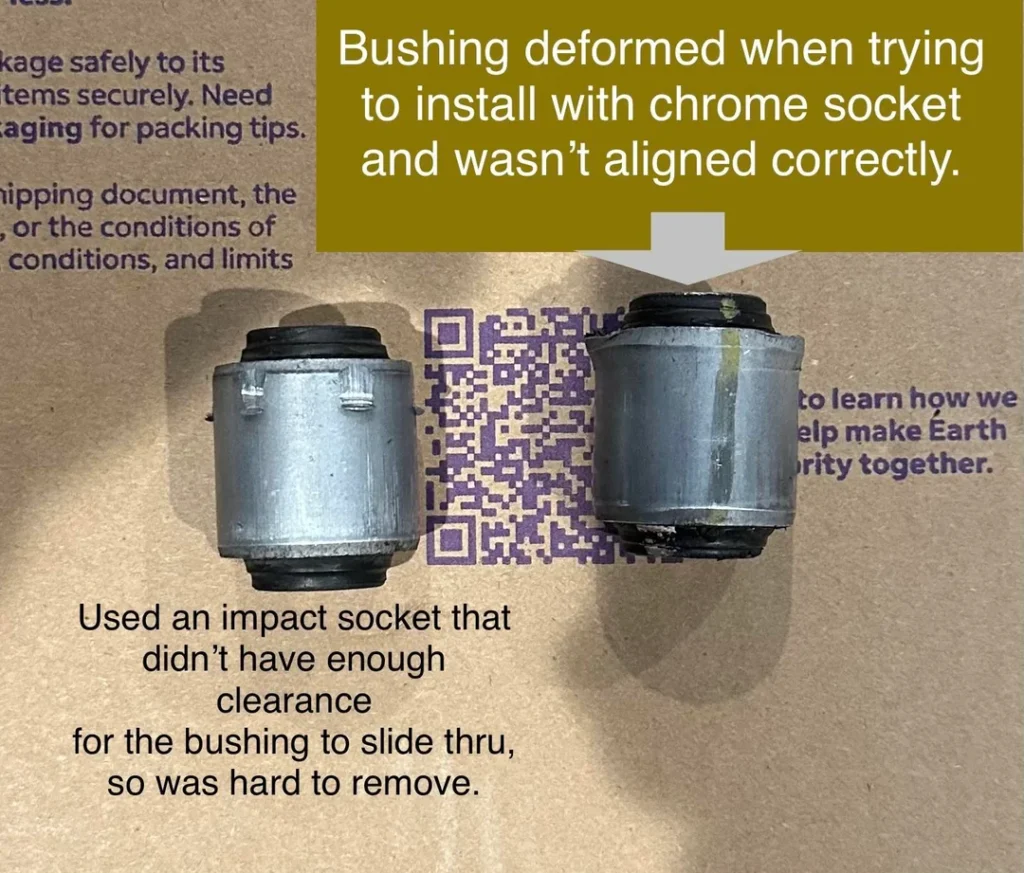
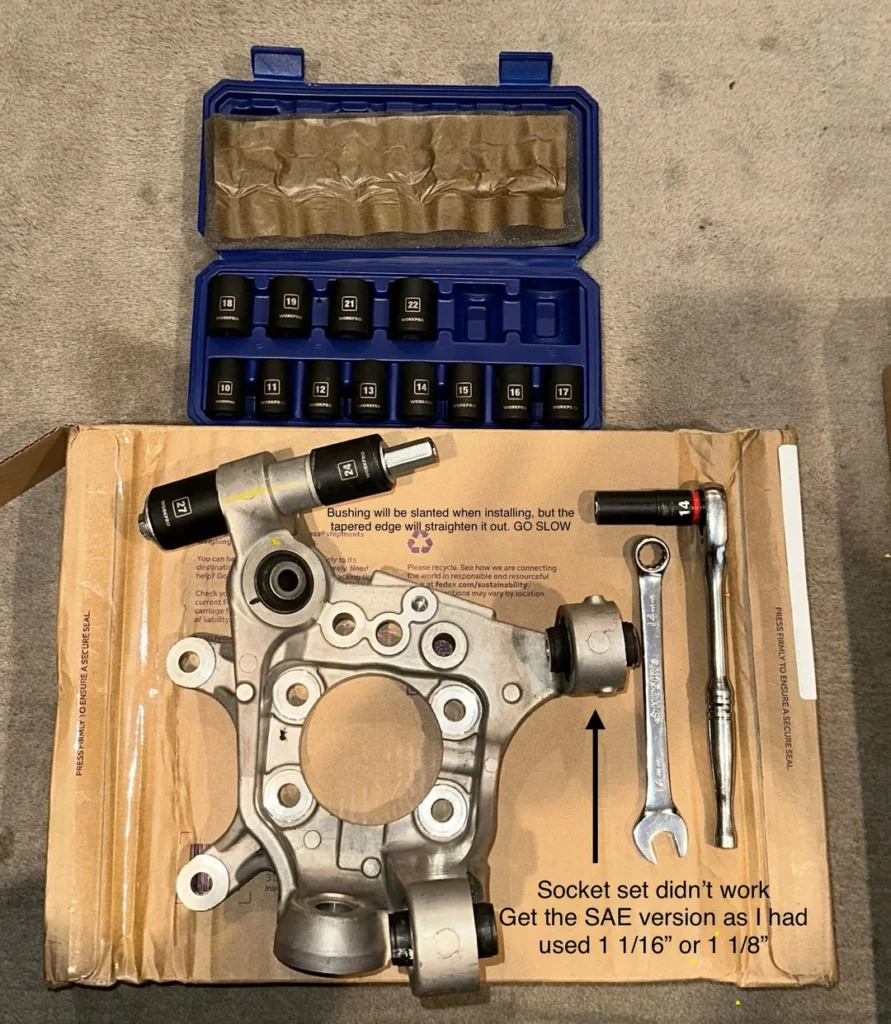
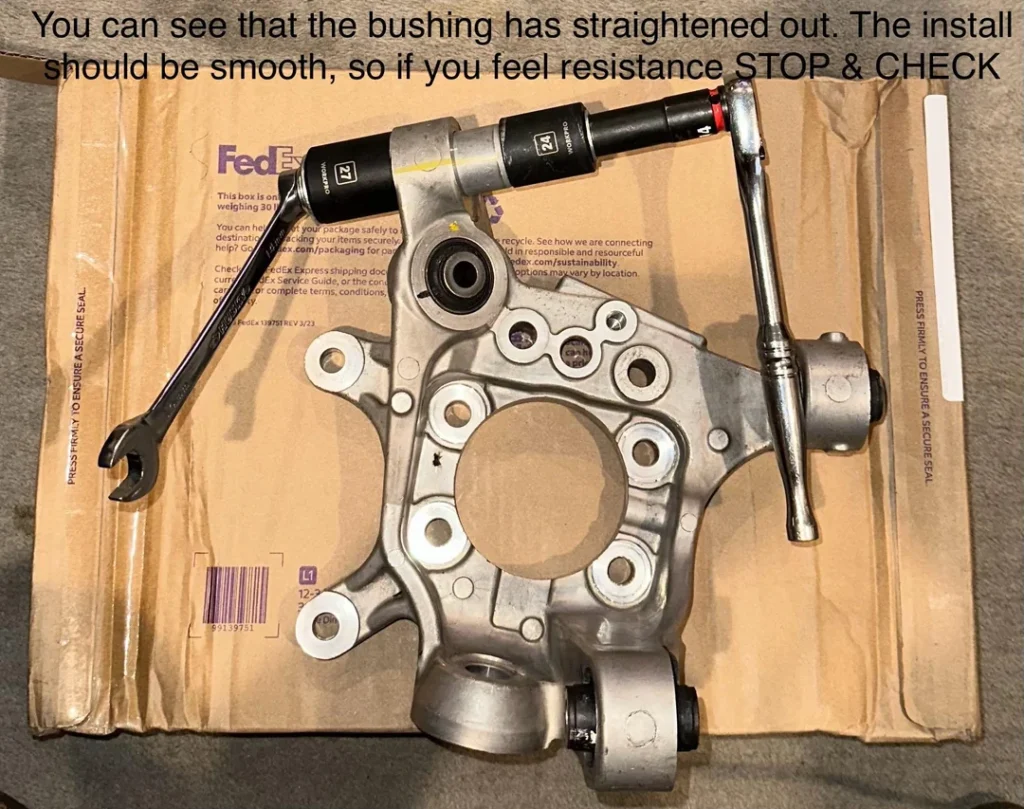
Most of info needed are in the photos, but if you have questions leave a comment.
INSTALL TIME & DIFFICULTY: 1 hour, but can be longer if you run into issues like me, but is easy once you get the hang of it.
Where to purchase: 1/2” socket set: Amazon.com Bushings: Nengun.com There are only 2 Nismo bushings available for the knuckle and the rest will be regular bushings. Hardware: Home Depot 3/8”x6” (3), Washer AGB (4), ACB (8), ABB (4) Ball joint removal tool/ Wheel bearing grease: Oreillys
Garage Rats addition: Using a 36mm impact socket instead of a ball joint remover cup works great. Use a 22mm socket to remove the small bushing and a shallow 1 1/16″ socket for the larger ones. Highly recommend buying extra washers, because they do get malformed easily.
How to remove: Use the smallest receiver cup from the ball joint tool along with the adapter that has the smallest hole (this would be used with the 3/8”x6” bolt along with the ABB washer and ACB)
Note if this is your first time: Once the old bushing is removed. Use it to practice installing, so you don’t deal with the issue I had where the bushing deformed and had to wait and buy another one.
Use a 22mm chrome socket to remove the small bushing (55152-AR000). Every bushing has a part number stamped on the rubber.
Installation: You can use a bench vise to prevent the knuckle from moving and prevent back pain. Another solution is using c clamps to hold it down on a table, but placing it on the floor and using your foot to hold it down works just fine.
Always grease the threads each time, so you don’t deal with stripped threads and for smooth installation/removal. You can use regular nuts, but I find the coupler nut to be better.
Chrome sockets are good for removal, but not for install in my opinion. Impact sockets have a bit more surface coverage and will prevent bushing from deforming.
The 6” bolt will be short due to the added length of bushing and socket used to install and the receiver cup/adapter, but it is possible and the coupler nut should grab about 2 threads to start it off. Tip: Find a larger chrome socket to act as the receiver as it will eliminate the use of the adapter that is used with the receiver cup.
Bushing should be flush with the machined end(shiny end).
Suggestion: Do not use an impact. I know it will make the process easier, but it will lead to deforming the bushings easier as well.
I may have missed some important info, but leave it in the comments if you have questions.
Hope this helps.
Garage Rats addition: Using a 1/2″ extension and a hammer to seat the sockets in tight spaces worked wonders for me as well.